Author: Melanthano

  • From cron to systemd timers

    You may have come across new Linux distributions don’t include cron. As they use systemd, they are encouraging you to use systemd’s timers instead.

    cron was simple to use

    crontab -e and enter the commands you need.
    Yes, there is the awkward syntax to say exactly when to run it, but, like me, you probably have something like this that you put at the top of your crontab:

    # mm hh dd MM dow
    #  |  |  |  |   \--day of week (0=sun, etc.)
    #  |  |  |  \------month (1-12 or jan/feb etc.)
    #  |  |  \---------date (1-31)
    #  |  \------------hour (0-23)
    #  \---------------minute (0-59) [*/5 = every 5 mins]
      30 04  *  *  1 /home/user/script 

    What follows is the systemd way of doing the same thing:
    at 4:30am every Monday, run /home/user/script

    Systemd timers

    Systemd timers aren’t hard to use, but the setup is different.
    You create /etc/systemd/system/mytask.timer

    [Unit]
    Description=this template runs every Monday at 4:30am
    
    [Timer]
    OnCalendar=Mon 04:30
    Unit=mytask.service
    
    [Install]
    WantedBy=timers.target

    and you create /etc/systemd/system/mytask.service

    [Unit]
    Description=this task does something
    
    [Service]
    ExecStart=/home/user/script

    Once created, check the syntax (and fix any errors)

    systemd-analyse verify /etc/systemd/system/mytask.*

    Then you can start the timer

    systemctl enable mytask.timer
    systemctl start mytask.timer

    and you can check everything is working with

    systemctl list-timers

  • Upgrade SSD with Bitlocker

    I have a laptop with a 500Gig SSD, but it’s too small. So I bought a 2TB SSD and replaced it. Here’s how I did it.

    About the Laptop

    The laptop is a Fujitsu U9311. To replace the SSD it was a matter of removing 10 screws from the bottom and lifting off the base. No clips to worry about. The SSD has a M.2 slot right there. The technical docs are available here.

    Great job, Fujitsu, why did you stop making Laptops?

    For reference, when booting, F2 will give the BIOS Setup. In setup I disabled Fast Boot so the Boot Menu is available.

    Press F12 to get the boot menu.

    Bitlocker considerations

    I’ve replaced HDDs with SSDs a few times before, and upgraded SSDs as well. Without Bitlocker in the mix, the process is relatively straightforward (the process below is good for this, and you can also use gparted to expand the partitions).

    With Bitlocker, I needed to know that the process wouldn’t interfere. It turns out that Windows is quite anti-fragile and you can do the things you would expect and it works.

    The thing I didn’t risk is using a 3rd party tools to expand the Bitlocker partitions. That wasn’t a problem because Windows Disk Manager can expand a partition into any free space that exists after the partition.

    Tools

    The (free) software I used is openSUSE Leap KDE Rescue x86_64.iso which I copied onto a 2GB USB stick. This build boots on my laptop and contains the two tools I used:

    • dd
    • gparted

    Process

    1. Put the new SSD in the Laptop
    2. Put the old SSD in a USB adapter
    3. Boot openSUSE
    4. Open Terminal and run su
    5. Check the devices (old was /dev/sdb, new was /dev/nvme0n1)
    6. dd if=/dev/sdb of=/dev/nvme0n1
    7. In another terminal (su) find the process number of dd and watch progress
      • ps ax | grep dd
      • watch kill -n 30 -USR1 999
    8. Wait – I was copying 500GB onto a 2TB disk. It copied at 44Meg/s, so was about 3 hours.
    9. Remove the USBs (old and boot) and reboot to check everything still works. It did. No issues at all.
    10. Reboot into openSUSE
    11. Open Terminal and run su, and then gparted.
    12. Then, starting at the right hand end, move partitions to their new start positions (but don’t change the partition sizes).
      • I have two partitions I wanted to expand: C: and E:. They were the 3rd and 5th partitions on the list, with partitions for EFI and Recovery there as well.
      • If a partition is not to be expanded, move it as far right as it will go.
      • If a partition is to be expanded, move it right and leave additional space to the right.
      • The left-most partition to expand (C:), is left with free space after it.
      • The actual move took about 3 minutes to move two small Recovery partitions and one 200Gig old partition.
    13. Reboot to Windows
    14. Using Disk Manager (Right click on My PC, Computer Management, Disk Manager), expand the partitions with free space after them.
    15. That’s it. No fussing, nothing unexpected.

  • Changing Workgroup can break Windows

    I discovered a way to break Windows 10 and Windows 11.

    Install Windows so you are signing in with an Azure Active Directory Account, and then change the Workgroup so it is the name of an existing WORKGROUP on your network (which, of course, is the only thing you might want to change it to). You will now find your computer will not boot. When Windows boots, the circling dots just continue to circle. Reports on the internet suggest that this continues forever (I’ve left it for multiple hours) or that it eventually stops.

    The Windows repair function isn’t able to recover from this situation – and the only option is to reinstall Windows from the recovery disk. Ouch.

    Or you can follow this relatively simple procedure to change the Workgroup and get your system booting again:

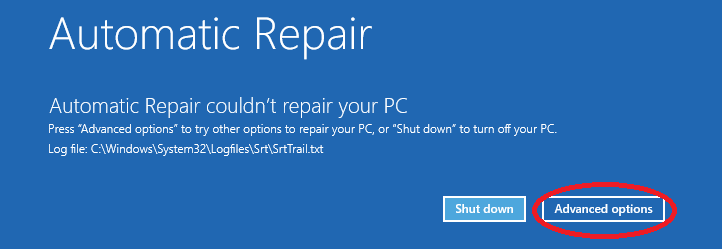
    Power off the computer and restart it – let the dots spin for a few seconds and repeat until you get the Windows Recovery screen.

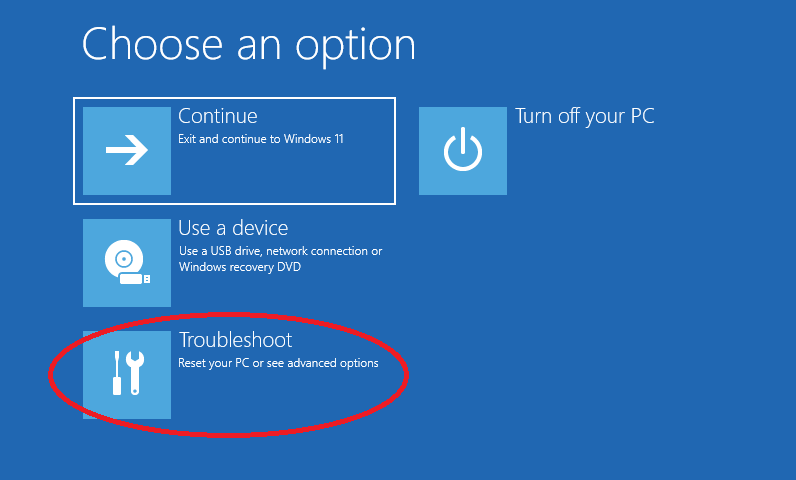
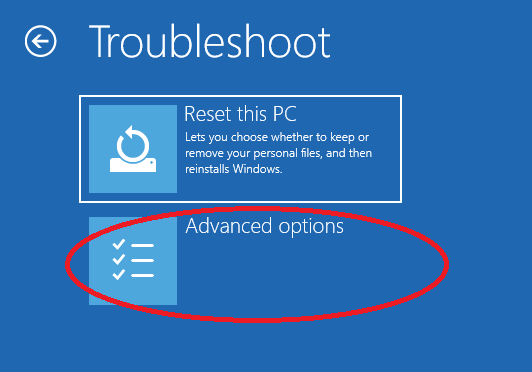
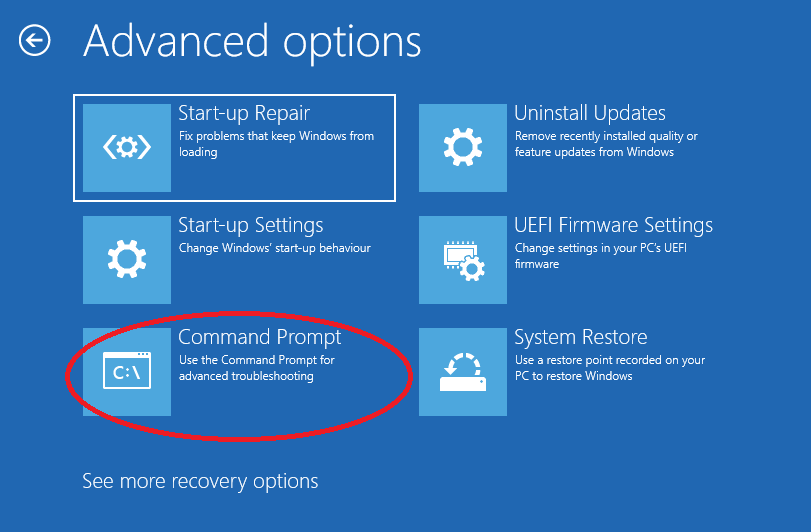
    The select Advanced Options, then Troubleshoot, Advanced Options, Command Prompt.

    We need to change a registry entry, which we can do with a few tricks.

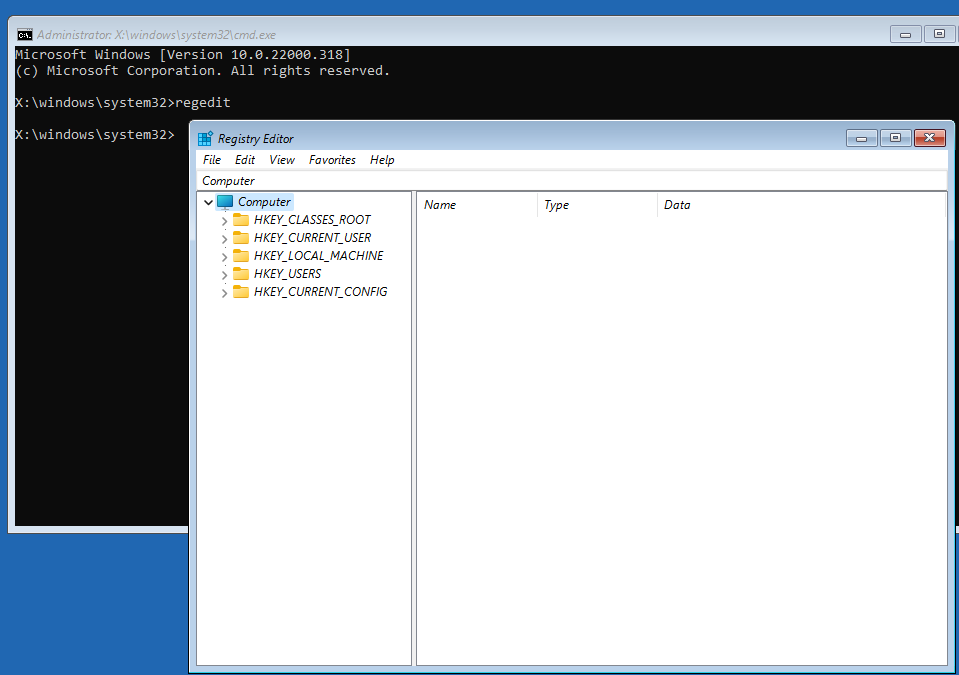
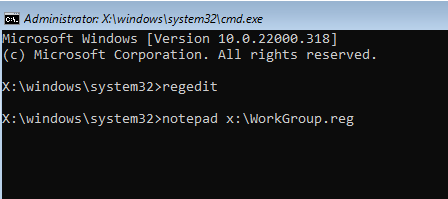
    First, run regedit.

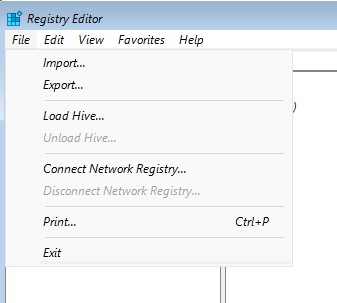
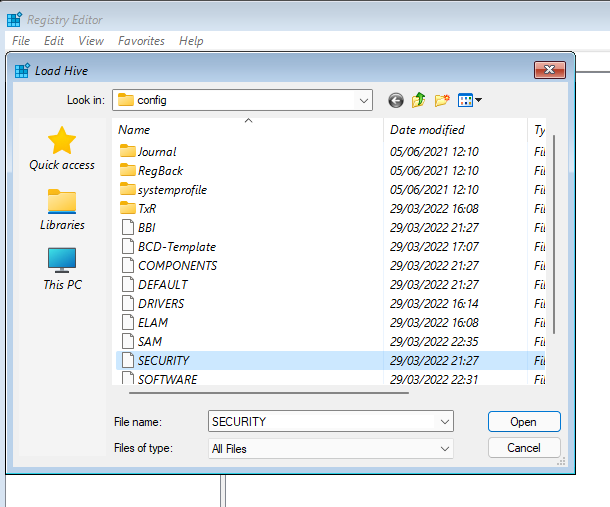
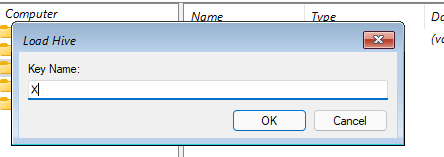
    Then, select HKEY_LOCAL_MACHINE, and do File \ Load Hive… and load the hive C:\Windows\System32\config\SECURITY at KeyName ‘X’.

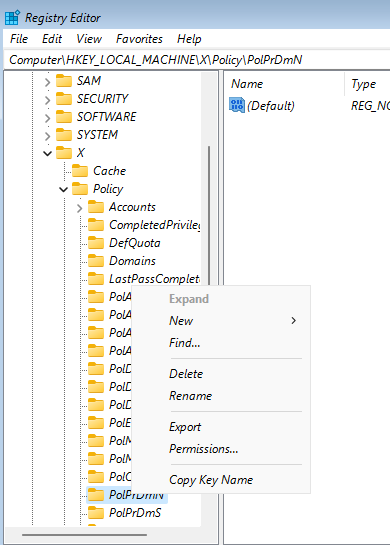
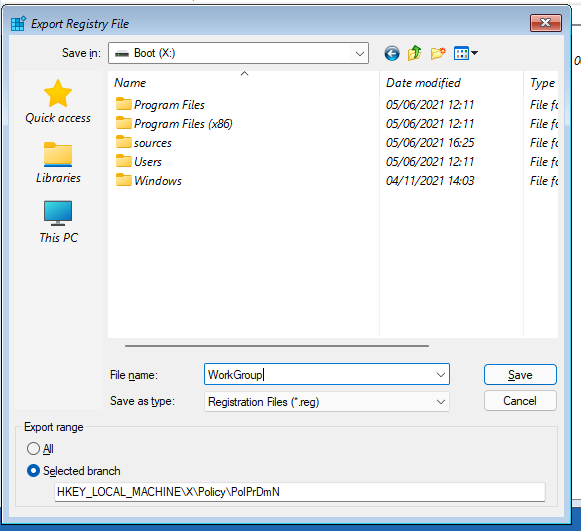
    Navigate to the key HKEY_LOCAL_MACHINE\X\Policy\PolPrDmN and Export it to X:\WorkGroup

    Then edit X:\WorkGroup.reg: in the Command Prompt, run notepad X:\Workgroup.reg

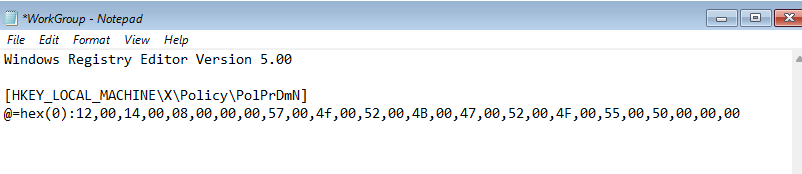
    Change the key so the Workgroup has a different name.

    The default name ‘WORKGROUP’ would have the setting:

    @=hex(0): 12 00 14 00 08 00 00 00 57 00 4F 00 52 00 4B 00 47 00 52 00 4F 00 55 00 50 00 00 00

    Close Notepad (and save the changes), then go back to RegEdit and import WorkGroup.reg

    Close Regedit, Exit out of Command Line and reboot.

  • Hello world!

    Welcome to WordPress. This is your first post. Edit or delete it, then start writing!